Step 1
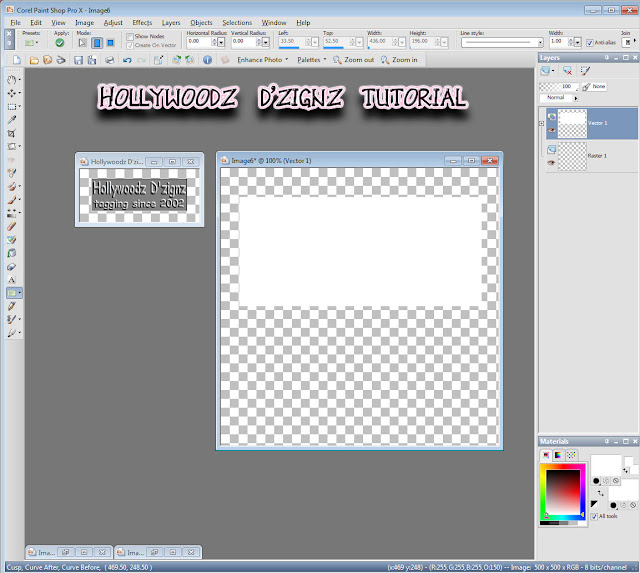
Open a new "blank" image screen

Then go to your tool bar on the left and chose Preset Shape Tool. I typically choose the rectangle shape, but you can choose whichever you like. Now you want to go to that blank image screen and make a shape. You can make it as large as you want. (you will be able to resize it for use, It's always better to make them a lil to large then to make them to small) Also be sure to have the color set to white in both boxes (lower right corner of preview)
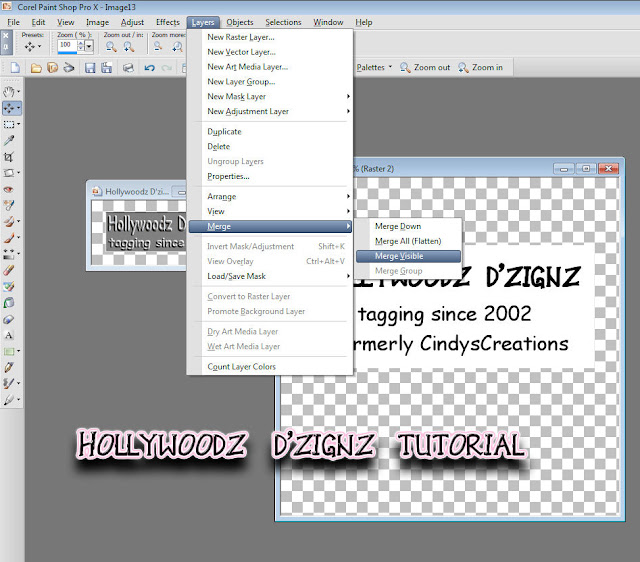
Next you want to go to Layers & Merge Visable
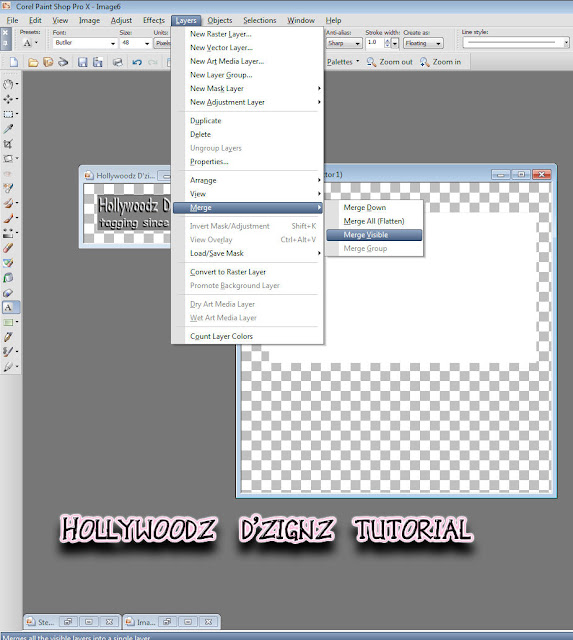
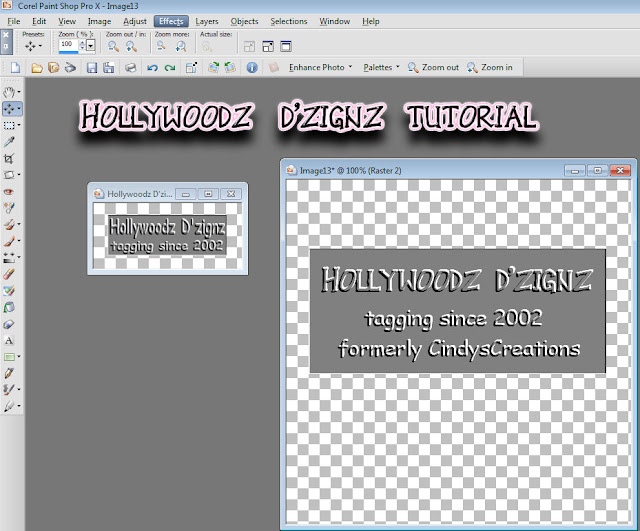
The next step is to put your information on your "watermark that you want to appear on it. Then Layers::Merge:::Merge Visable
The next step is to go to Effects:::Texture Effects:::Emboss
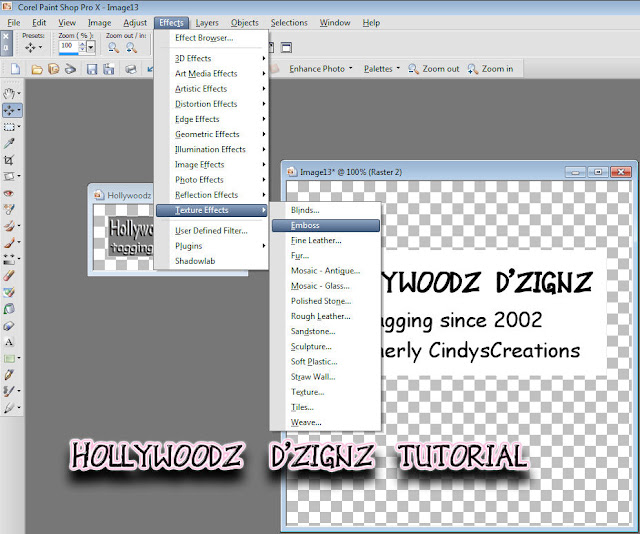
This is how it will look after you emboss it.
Our next step is to save it. I always save mine as a PSD (Photshop File) but you can save yours as a PSP File and it will work for you in PSP.
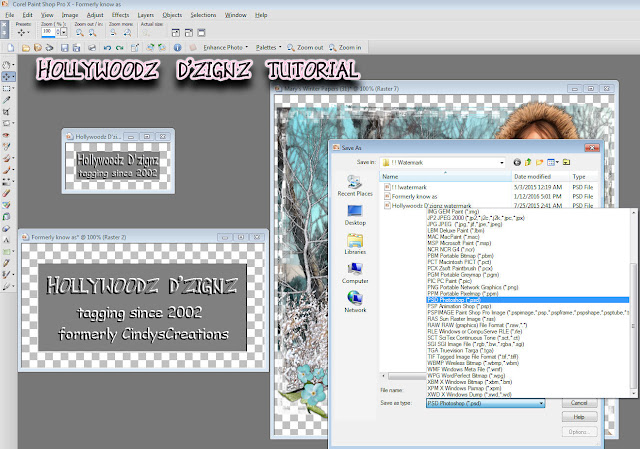
Be Sure to save it to a folder where you can remember where it is. I made a folder expressly for my watermarks and named it Watermarks.
How to use your Watermark you just made in PSP.
Open a tag that you have and make sure you have your watermark open also. Next you want to copy and paste your watermark to your tag. Be sure to place it where you want it to be, The trick to using watermarks is not always for an everyday collector to notice it but to place it where YOU know it is. I do mine usually in a hard to spot place, but generally where I will remember it is.
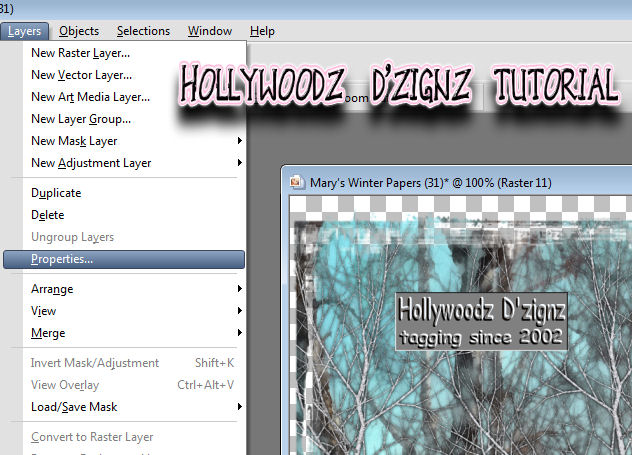
Now you want to go to Layers then Properties.
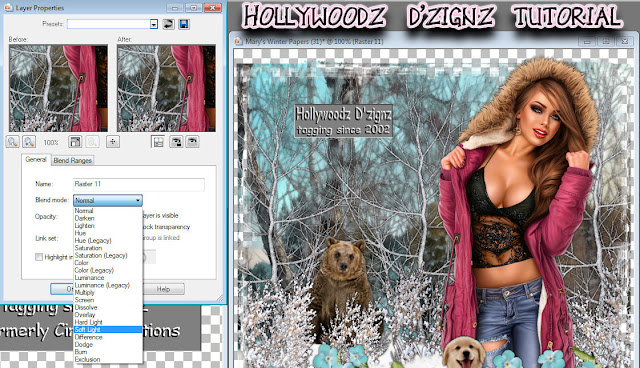
A window labeled Layer Properties will pop up for you. You want to go to Blend Mode and then SOFT LIGHT and click on it

Your watermark now looks like this and you are able to save your tag as is. Viola....you have just made and used your very own watermark!
Happy Tagging!!!

Next you want to go to Layers & Merge Visable

The next step is to put your information on your "watermark that you want to appear on it. Then Layers::Merge:::Merge Visable

The next step is to go to Effects:::Texture Effects:::Emboss

This is how it will look after you emboss it.

Our next step is to save it. I always save mine as a PSD (Photshop File) but you can save yours as a PSP File and it will work for you in PSP.

Be Sure to save it to a folder where you can remember where it is. I made a folder expressly for my watermarks and named it Watermarks.
How to use your Watermark you just made in PSP.
Open a tag that you have and make sure you have your watermark open also. Next you want to copy and paste your watermark to your tag. Be sure to place it where you want it to be, The trick to using watermarks is not always for an everyday collector to notice it but to place it where YOU know it is. I do mine usually in a hard to spot place, but generally where I will remember it is.

Now you want to go to Layers then Properties.

A window labeled Layer Properties will pop up for you. You want to go to Blend Mode and then SOFT LIGHT and click on it

Your watermark now looks like this and you are able to save your tag as is. Viola....you have just made and used your very own watermark!
Happy Tagging!!!
No comments:
Post a Comment